Ceramics blog
A Beginner’s Guide to Underglazes
May
This is one of the question that I get often : UNDERGLAZES ! It has the following variations : how do you paint your ceramic animals ? Do you use Underglazes ? When do you apply underglaze and which brand do you use ? and more.
Some ceramic artists would consider this a trade secret but I don’t. So here’s how I do it and the brands I use, all of the underglaze questions answered in this quick beginner’s guide to underglazes.
The Best Ceramic Underglazes
Along the years, I used several brands of underglazes. There’s no such thing as “The Best Ceramic Underglazes” : there are so many uses and techniques that my brand of choice might not suit you at all. I would suggest that you test a few bottles of various available brands before settling on one.
Duncan Underglazes
I used Duncan at first and I really liked the variety of colors as well as the brushability. The CC series was a good product overall, but two things happened. One : I moved studios and the clear glaze recipe changed. This had an impact on my colors : some faded or even changed completely. A mint became a grey and a brown became muddy instead of saturated. Then the Duncan company was bought by Mayco and they stopped making most of the CC underglazes.
This is what you subject yourself to when you use commercial underglazes and glazes. You are depending on recipes changes and industry whims. A good way to avoid this is to make your own glaze for example but I’m straying from the subject ^^

After Duncan, I tried out Mayco Underglazes, and it went well for a while but I found some colors to be less interesting.
Mayco Stroke and Coat vs. Underglazes
Fun fact : Mayco’s stroke and coat are not underglazes. Those are cone 06 to 5-6 glazes so be careful when firing them, they will stick together and behave like glazes. Meanwhile true underglazes usually don’t fuse with each other in the kiln so bisque firing can happen as usual (piling, touching pots in the kiln).
Speedball Underglazes
I switched to Speedball Ceramic Underglazes which are pretty good color wise. But then again, I got a few bottles of key colors that proved unbrushable and lumpy. I added Darvan to try and make it more usable but it didn’t work as well as I expected. Their new reformulated underglazes seem to have this solved, I should be able to test it out soon enough.
Amaco Underglazes
I finally switched to Amaco Underglazes and they seem to be the best ceramic underglazes for my specific use. A few colors still don’t like my clear glaze : teddy brown, peach and a few others aren’t part of my palette.
Keep in mind that most colors are mixable, even between various brands. Everything you need to know about underglazes compatibility you will learn by testing.
Testing underglazes
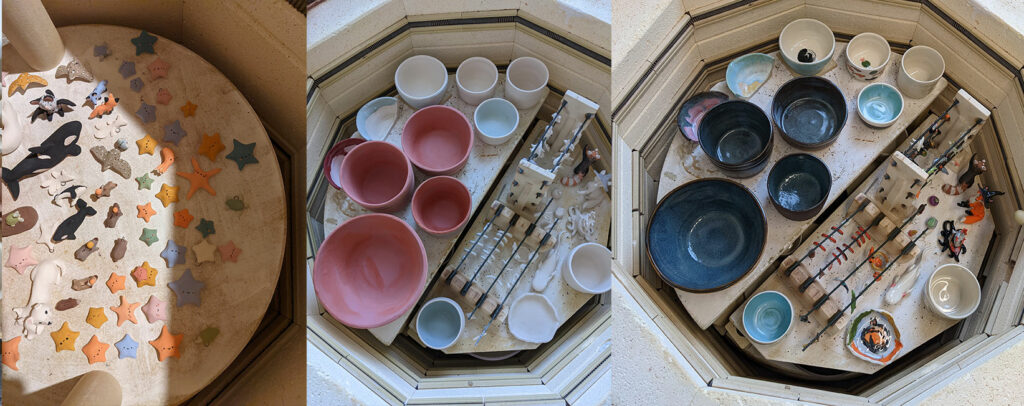
I put together a test tile system for underglazes. It’s a full DIY system with a wooden board, nails and hexagonal tiles. This helps me both test clay + underglaze + glaze compatibility and visualize actual colors.
Working with underglazes isn’t easy because most of the time you can’t see the final result until the final firing. It’s a lot of guess work and test before being able to pull an accurate color work.

You’ll often see test tiles that are split in half : one half is matte and the other is shiny. This is what I do to test for underglaze vs. unglazed color. It’s helpful to see the difference and it saves space so you don’t have 2 test boards per brand. I kept all my test tiles even from brands that I don’t use anymore, just in case I need to go back to an older reference.
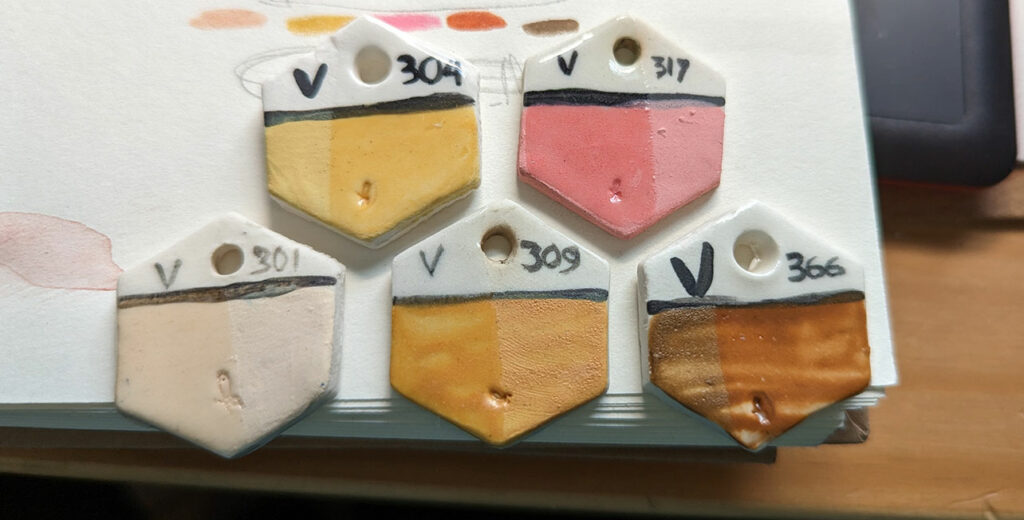
It’s important to know that an underglaze final color will change depending on the clay it’s used on and the glaze you’ll pair it with. Some clear glaze won’t be compatible with your clay, your underglaze, or both. Most clears containing zinc will not work with reds and browns, sometimes greens. Kitten clear glaze recipe will make my blacks runny and smudge most colors. It’s ok if you don’t necessarily want crisp lines. But I rely on crisp lines and very defined edges so, this one’s not for me !
A few clear glazes will also craze on various clay bodies. Kitten clear and tucker’s ultra clear will craze on plainsman P300 porcelain for example. All of these combinations are highly variable so you just have to test your combos multiple times.
Glazes vs. Underglazes : What is the Difference ?
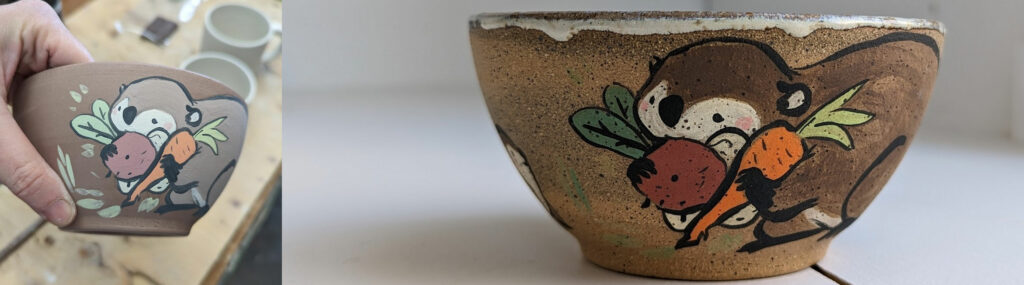
Their use are so very different to me that it’s not even a debate. I would not be able to paint my handmade tableware as I do with glazes, period. The décor is painted with an underglaze and the whole piece is then covered with a clear glaze and sometimes several glazes are used inside the vessel.
I covered Glazing for Beginners in another article.
The difference between glaze and underglaze is that glaze are not as sharp and they will smudge, run, disperse on the surface of your piece. Which is their intended use, they were not made for detail work. They’ll mostly be shiny while underglazes are mate. Glazes are used for lining a piece usually, coating an entire vessel inside and out with a color or clear vitrified surface. Glazes are the shiny aspect of ceramic tableware.
Underglazes, on the other hand, are made for painting, they’re meant to be covered with a transparent glaze, or not.
As a matter of fact, underglazes can stay unglazed through the whole process. That’s the technique I use for colored clays like black, speckled and red.
Working with underglazes : my process
This is the way I work with underglazes, there are may ways and processes 🙂
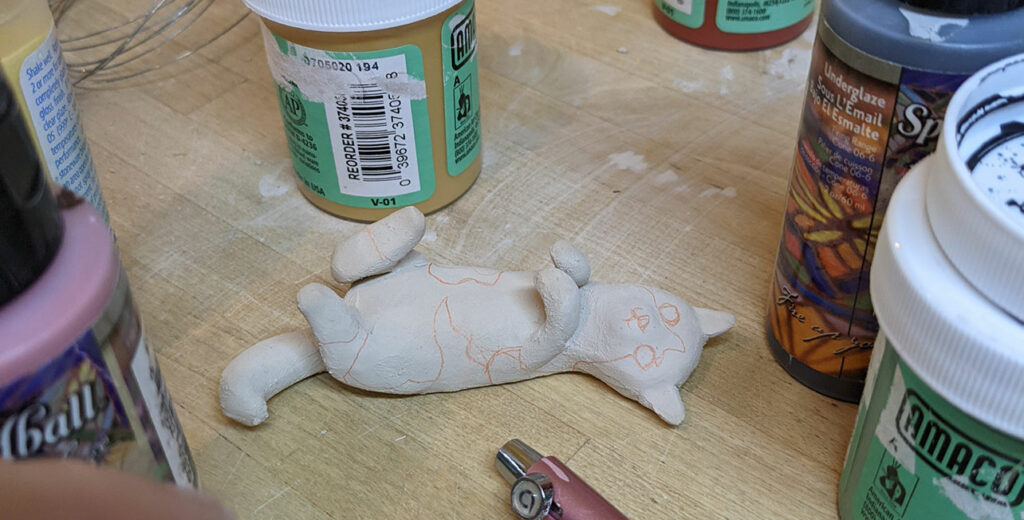
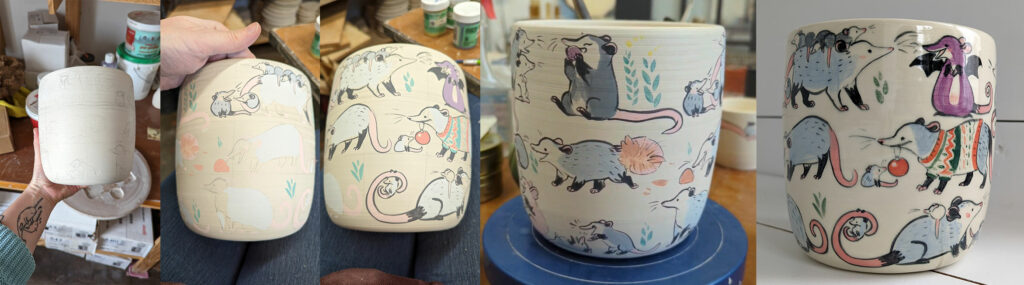
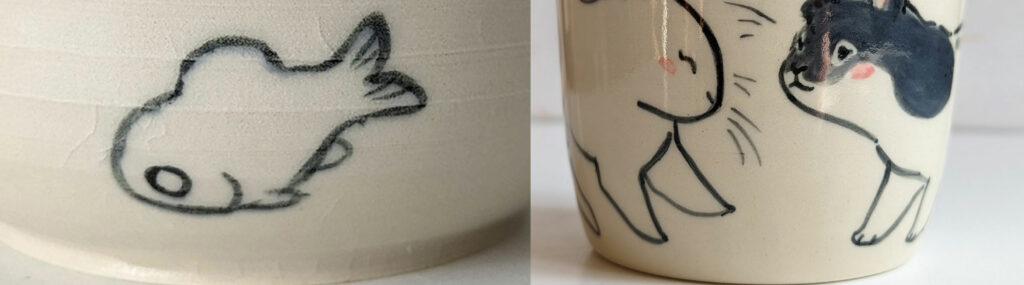
I usually apply underglaze on a bone dry piece. It’s the most fragile state of clay, so it’s a delicate process. I will draw with a lead pencil if needed, and then apply colors, from light to dark. I will first add the lighter layers and then darker until I paint the outline in black.
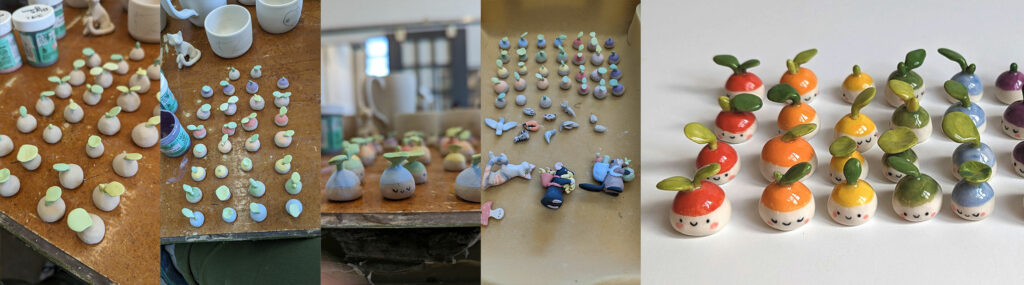
I apply one to three coats of underglaze. It depends on the color and backgrounds. White on dark clay will need 3 colors, while most outlines in black will need one. For most colors, 2 coats will do. Once again, you’ll need to test.
The pieces are then bisque fired. I will be able to correct my work slightly at that stage. Once dry, I will glaze the piece in a clear glaze that I tested beforehand.
Once the glaze firing is done, I will be able to add gold luster.
Check out a few step by step blog posts :
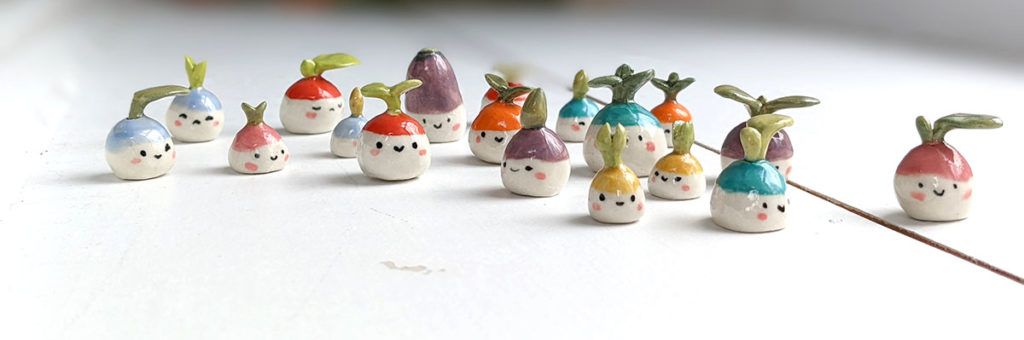
- Opossum Grandma and Christmas Tree
- Handmade porcelain jewelry
- Wedding porcelain pendants step by step
- Sculpting a custom tiger figurine
- Full process video
You can support me on Ko-Fi in order to see more videos and content.
Tips and tricks
Here are a few things I learned in my years of painting on ceramics :
- You can draw on your pieces with a regular pencil, it will burn off.
- If your underglaze get smudged, it’s probably a glaze issue, test some other combination.
- Underglazes can be impacted by both clay and glaze.
- A bumpy underglaze can mean a too thick application or glaze incompatibility.
I hope this helps you work out your relationship with underglazes 😀 Feel free to link to this piece from your website, or share it if you found it useful.
Questions I encountered along the way
I often get questions about this so I will update this part along the way !
Can you put underglaze on top of glaze ?
Technically you can add underglaze on top of glaze, but it will probably not result in something elegant or interesting. It’s like putting clay on top of glaze so I’d expect a rough texture, bubbles or pinholes. As usual, this kind of general question doesn’t have just one answer : the glaze and clay body will behave differently depending on composition. Test your idea on a small piece, put it on a cookie (a little bit of bisqued clay protecting your kiln shelf) and explore from there.
How to use underglaze on bisque
It’s the same as using underglaze on greenware except that it will dry much faster due to the absorption provided by the bisqueware. Some underglazes do better on bisque than others, I like Speedball better on bisque because of its texture. On bisque, underglaze is less easily corrected or erased so it’s best to do this when you’re a little more experienced. One as thing : underglaze can run on bisque fired pieces when you dip or brush glazes over them. The brush or dip will drag a little bit of underglaze making your design less sharp. It’s ok if it’s the intention, but otherwise some people bisque again at a lower temp before glazing, simply to fix the underglaze on the piece.
Can you use underglaze on bisqueware
Yes you can! As stated above, you can paint your bisqueware with underglazes. It requires different precautions especially if you want neat edges to your design but otherwise it’s a good way to make your ceramics pretty.
Does pencil burn off in the kiln?
Yes it does ! I usually draw with a lead pencil on my greenware to get a sense of the illustration I’m going to paint. Once bisqued, the pencil burns off completely and leaves only the underglaze painting. I’d recommend testing on a few tiles to see if your particular pencil burns completely off, I know some colored pencils will endure firings so we want to make sure your pencil is ok. Most are. I use regular Blackwing pencils and they work out great.