Ceramics blog
How do I transport unfired clay ?
Feb
Like many potters, I sometimes have to transport unfired clay, greenware or bone dry. I often work from my home studio, sculpting clay animals or porcelain jewelry while both my kilns are in a studio, a few miles from there. This implies transporting greenware clay from a place to the other. I am lucky enough that I have a car, but this method should work for any mean of transportation that you’ll use.
What’s the key to greenware transport ?
There is one key element to keeping your fragile greenware or bone dry clay safe : movement. If your piece doesn’t move inside its box, it’s basically safe. I only reuse materials for this, I did not buy anything so it’s also completely free and environmentally friendly.
How to build your own unfired clay transport box ?
You will need :
- Cardboard boxes, size matching your pieces
- Foam, I got mine from a friend but I bet there’s someone who has it near you
- Cutter / glue if you feel like doing a more permanent moving box
I keep all of the cardboard boxes we receive at home. Since the pandemic hit, we ordered quite a lot of stuff online so I have a lot of perfectly sized boxes for my ceramics figurines and porcelain jewelry.
A Cardboard Box and Foam
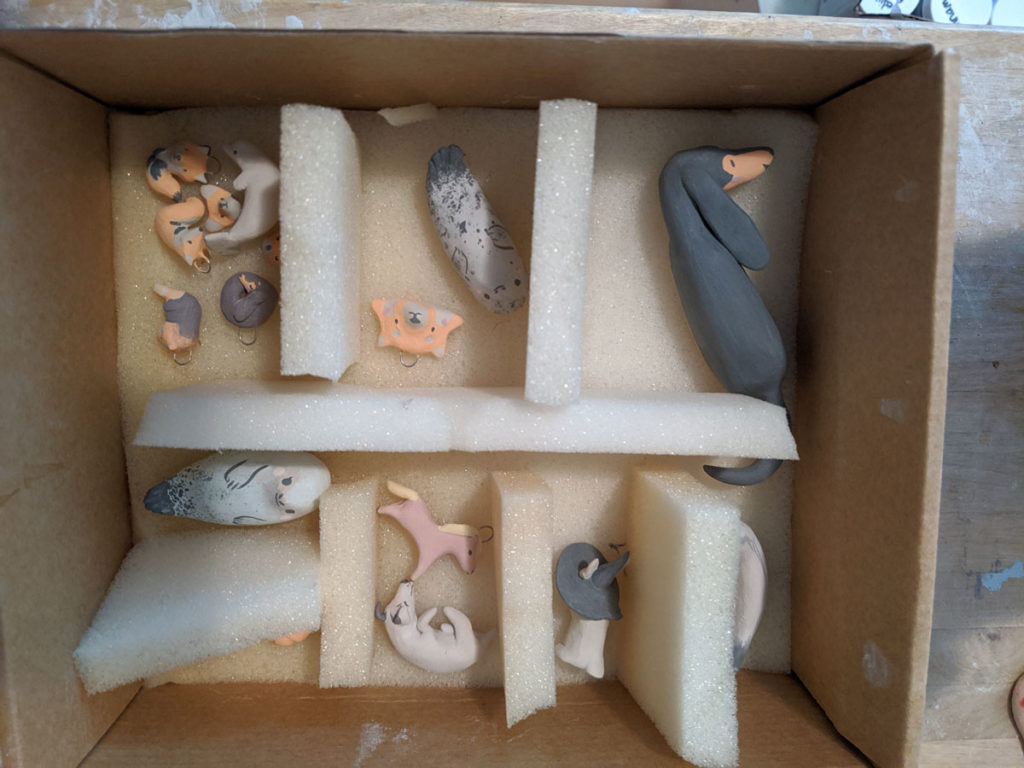
I like self closing boxes best, but any will do. So at first, I will cut a piece of foam the size of the bottom of the box. It doesn’t have to be exact, a little more is good. Then I’ll divide the box in usually 8 pieces, because that works for my pieces. I’ll either use a marker to do this, or do it mentally. Then I’ll cut pieces of foam that will be the walls as follows :
- One piece that’s a little smaller than the height of my box, and almost as long as the longest side.
- 6 little pieces that are the same height as the previous long wall and almost as long as half the width of the box.
These 7 pieces are the walls that will keep each piece from the other. I will then cut the base foam in the middle, carfeful not to cut it in half though, I leave half an inch on either side. And I’ll do the same with each side, 3 times.
The foam material behaves so that just by inserting the walls inside the cuts, it holds. That way, each of my unfired clay sculpture has her little box inside the box. If you want a more permanent solution, you can glue the foam together. I like to be able to remove a wall if a piece is too big so my boxes are usually not glued.
Moving the clay in your safe greenware box
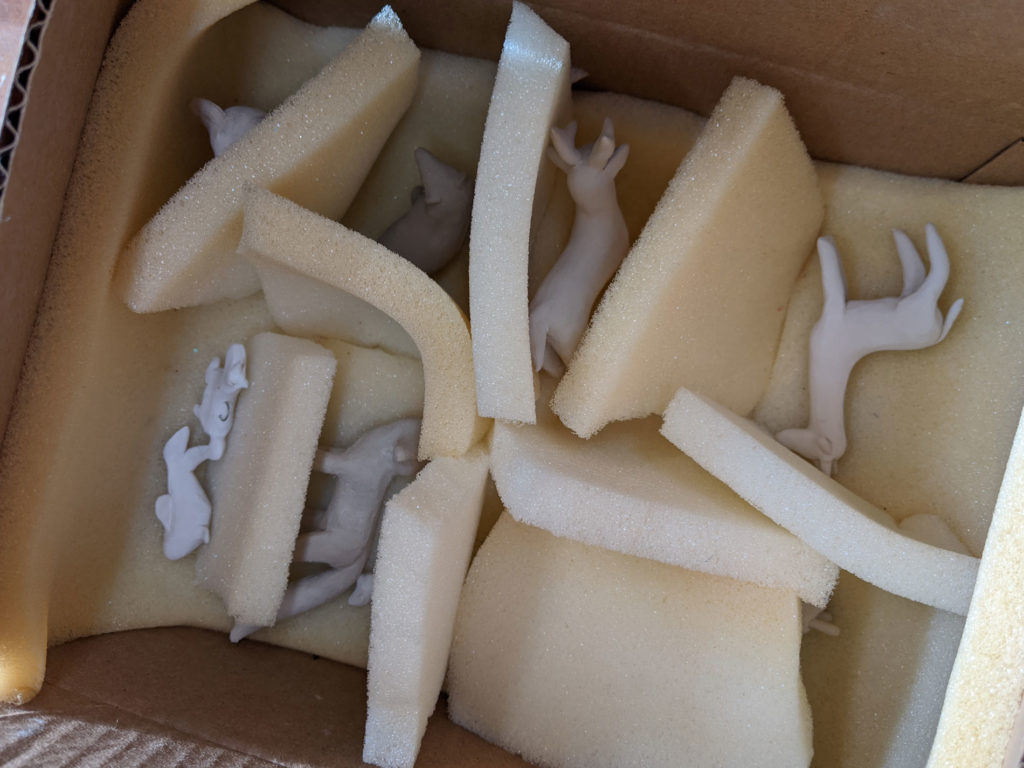
I usually put one piece per little box of foam. You should place your pieces in such a way that when you wiggle the box they do not move. If they put their weight onto tiny parts, they will break so you should make sure that they cannot turn in their space, without applying more weight. I have tiny pieces of foam that I sometimes add to support limbs or horns or antlers.
You should also pay attention to how the box closes in order to not have any piece of clay in the way.
Transporting several unfired clay boxes
I can add 8 big pieces to a box, so I made a few more boxes. I move them by using a simple grocery bag, the rectangle ones that are quite sturdy. Once the boxes are inside, I also have to prevent any movement from the boxes in the bag. I will usually add cloth or rags to either side so everything stays in place !
That’s it, I gave you all my secrets for transporting unfired clay ! I honestly thought about using more advanced systems but I would just be paying for more plastic, so I’ll stick with my DIY system that works wonderfully !
If your bone dry clay breaks, I also wrote a piece about repairing bone dry clay 🙂
Plus, it works with bisque and fired pieces too when they come back from the studio to my home ! If you liked this blog post, give me a follow on Instagram !